Improving the NORDEN gateleg table
NORDEN is a gateleg table (with foldable desk) from IKEA. I bought it without much thought because of the nice look and it seeming ideal for my small apartment. I quickly discovered some flaws in its design, but they could be fixed without much trouble.
This article lists the problems I had with the table, and my solutions to them. I’ll try to explain the modifications so that anyone could follow, but if you have any questions, please don’t hesitate to ask for details. I’m not sure about the English terminology in some parts, but you should figure it out from the photos.
Meet NORDEN
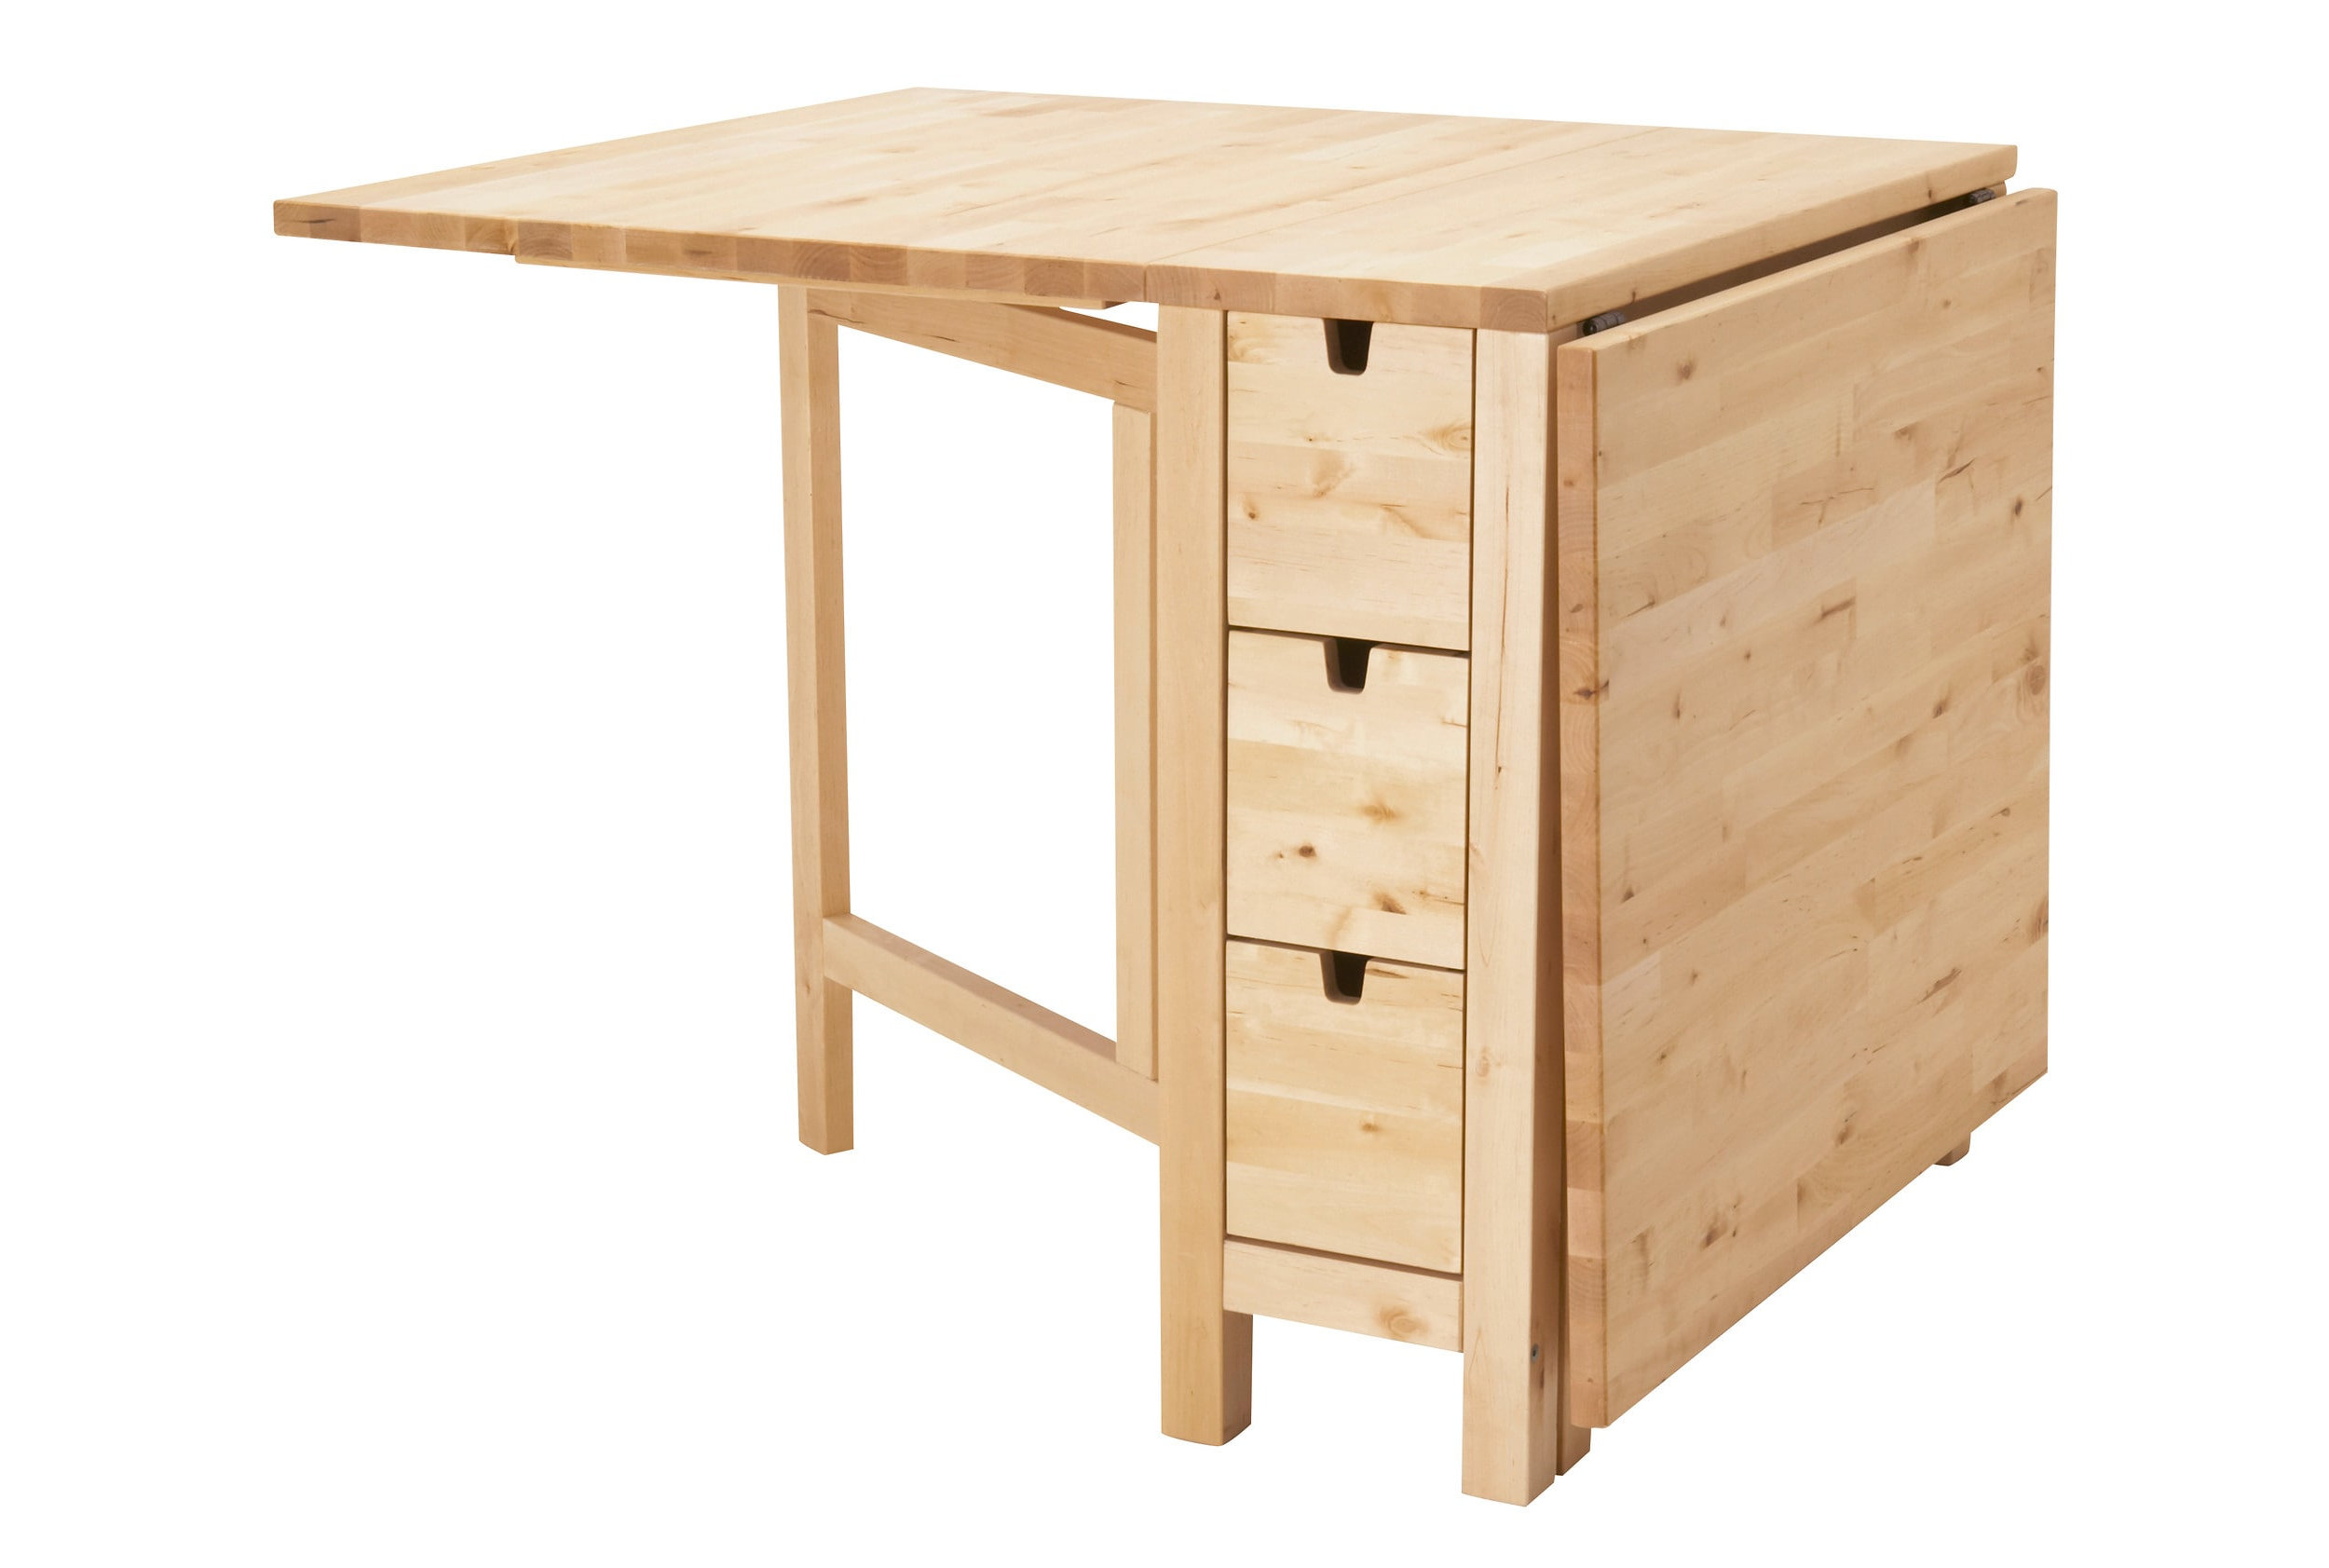
It can be as small as 32×80,cm when folded, but expands to amazing 150×80,cm, or the more conservative 89×80,cm with only one wing open. Besides the large surface area, the table includes six tall drawers where you can store e.g. napkins or cutlery.
The drawers’ inner dimensions are 34.4×13.3×17.7,cm, enough for several packages of flour or sugar, all your spices (unless you’re a spice maniac), a package of napkins (or several) and stuff like that. It can hold three bottles of wine per drawer.
NORDEN is a good choice if you don’t have room for a regular table, or don’t need one all the time, and the extra storage space is always a plus.
Assembly
I didn’t take any photos of the table assembly, but it was quite straightforward. It comes in two paper boxes, I think one contained the desks and some drawer parts, the other had the legs and body. The underside of the table (legs and the central piece) comes pre-assembled in two parts that you screw together. You then mount the desk atop this after screwing it together from the three hinged pieces, and you’re basically done.
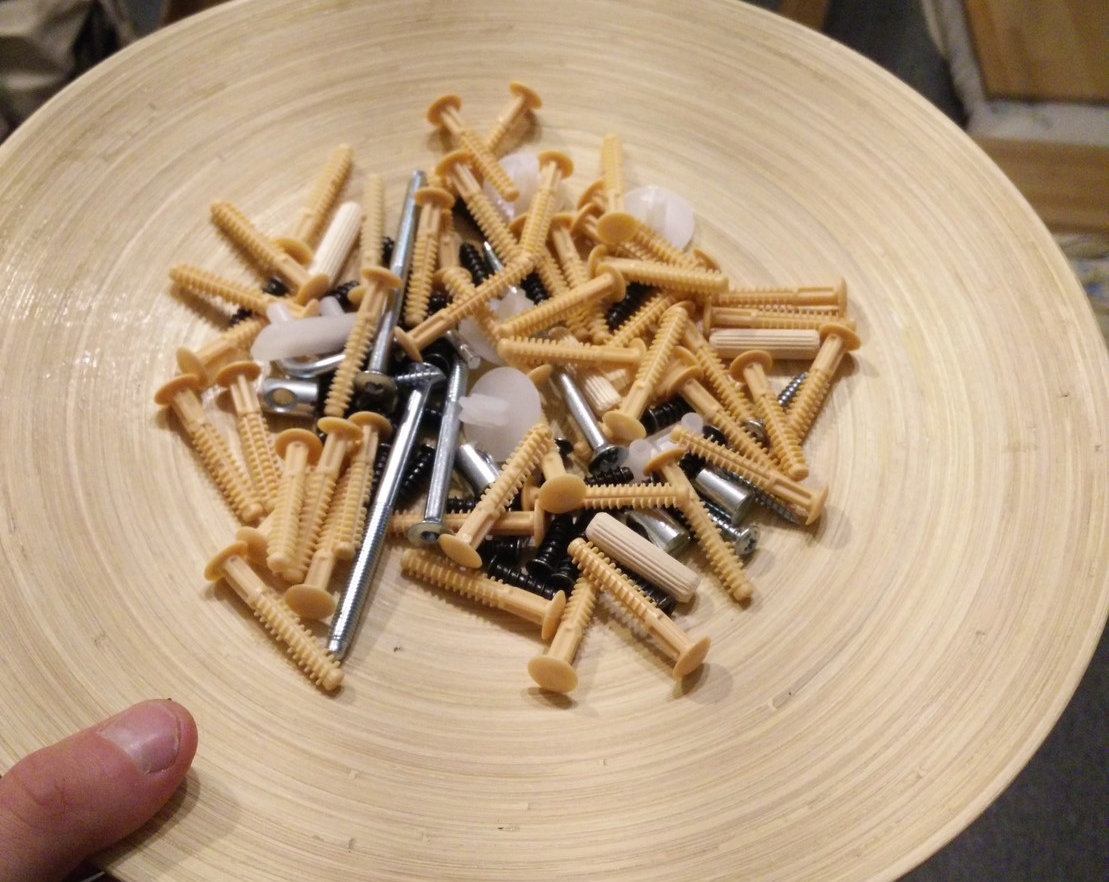
The drawers are a pain to put together, because IKEA saved on screws and used those stupid plastic thingies you’re supposed to hammer into pre-drilled holes. It just doesn’t work too well, they bend, sometimes refuse to go all the way in, etc. You could shop for compatible screws and try to replace them, I used what they gave me and it eventually worked out, but it was by far the most annoying part of the assembly.
Flaws
Folded Wing Rattling
The table is fine as is if you want to either use it fully expanded, or fully folded. But if you open just one wing, it tends to rattle. This is because the other leg is angled so it stays above the floor when closed, and because the other wing’s bottom end touches the central part of the table and partly the leg piece. When the construction moves ever so slightly, these two mobile elements bounce against with each other and the table’s body, making annoying noise. See for yourself if you encounter this issue as well.
The desk touching the body is easy to fix with a piece of felt, like those adhesive felt pads you can buy for chair legs.
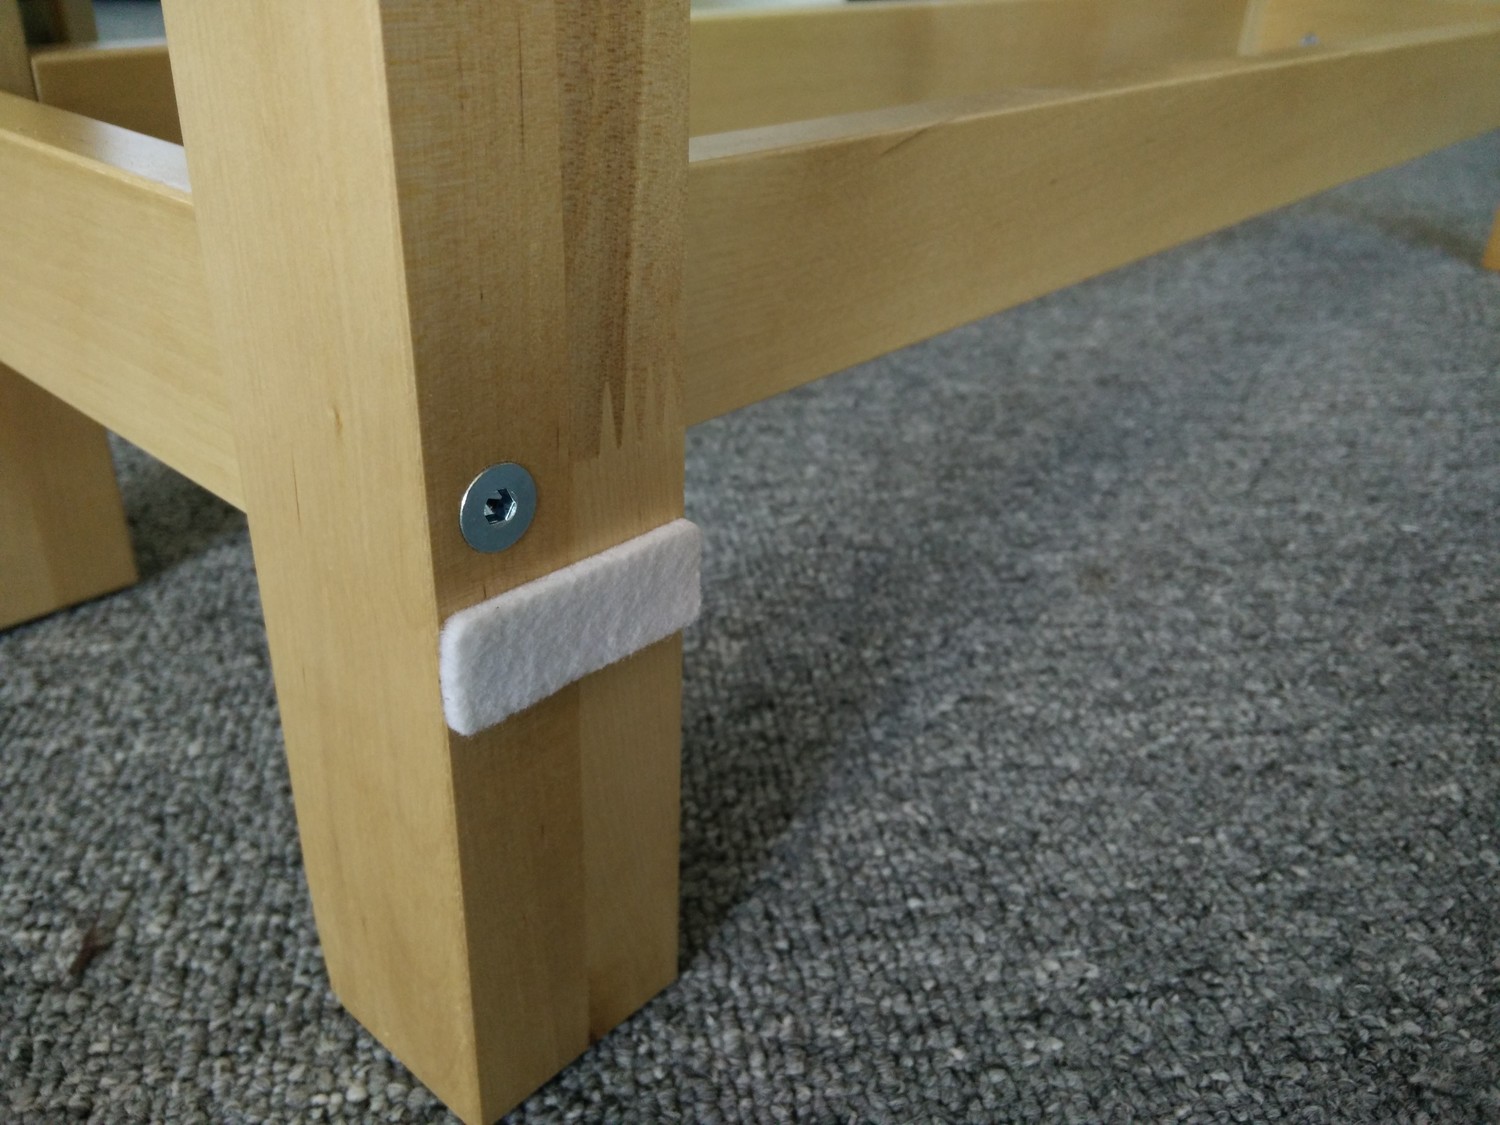
The folded leg rattling against the body and the folded wing is a bigger problem; there may be a simnpler way to deal with this, but I had good success with magnets. Mark a position where the leg touches the body piece, and either drill a hole and embed a magnet in the wood (like I did), or use an adhesive magnet. You might have luck with a Velcro sticker or some other method, too.
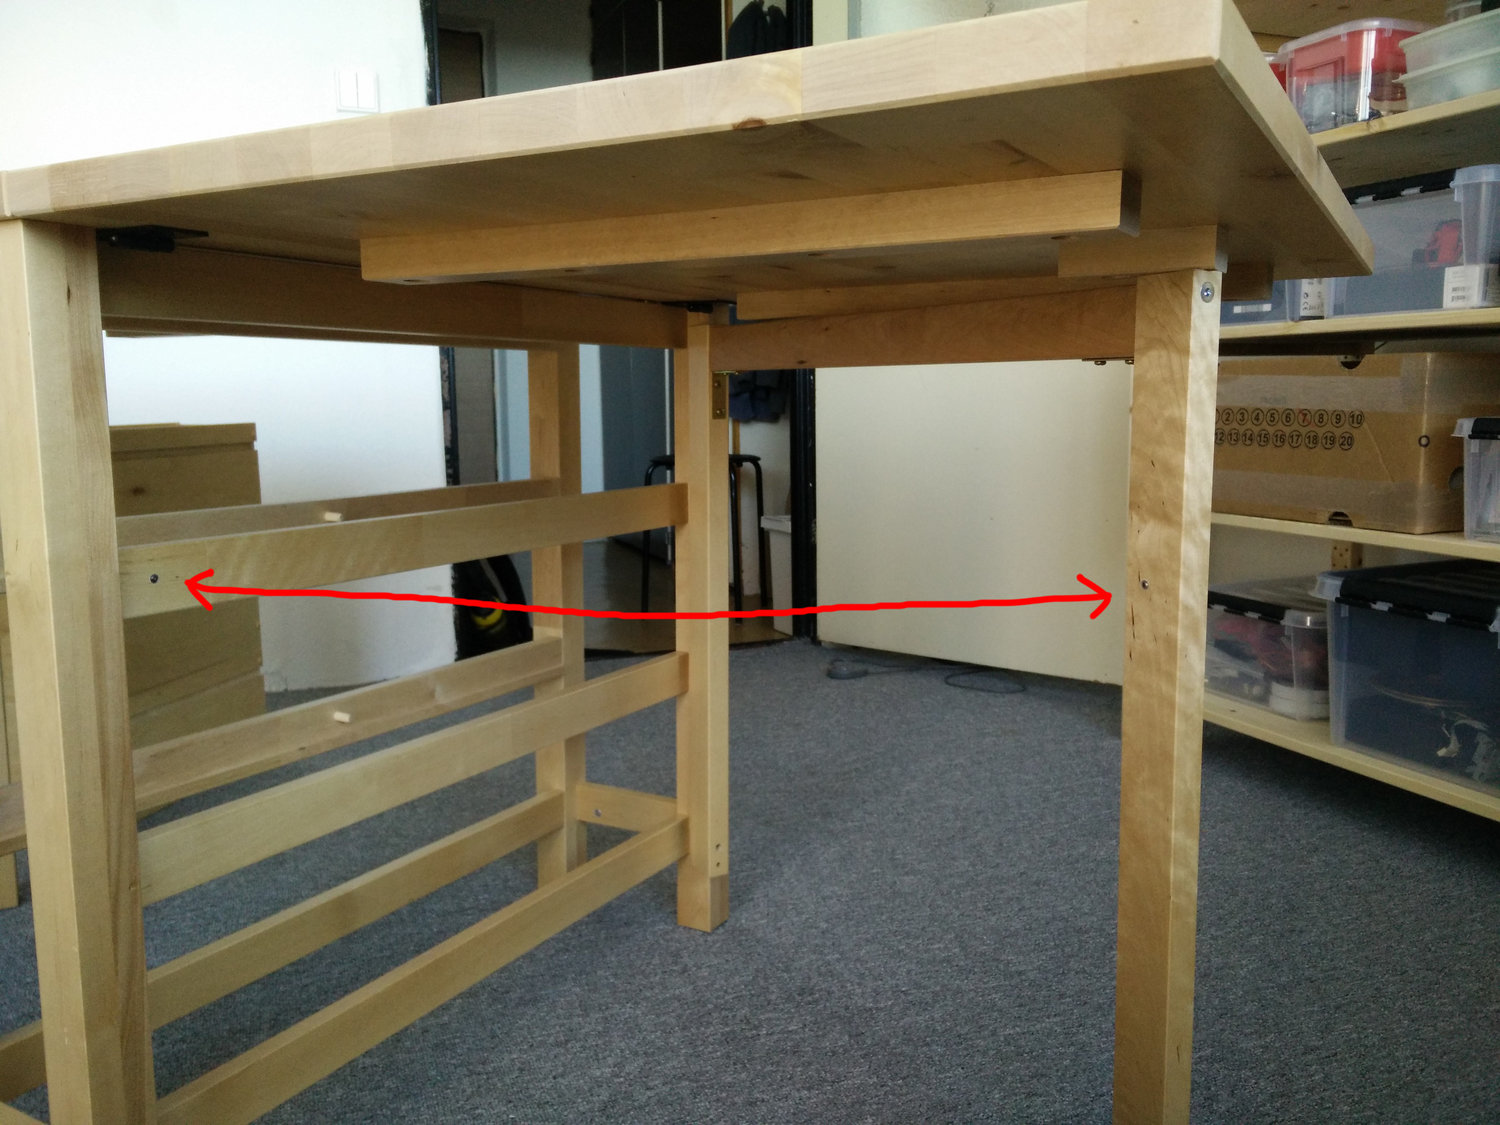
The Bottom Beam
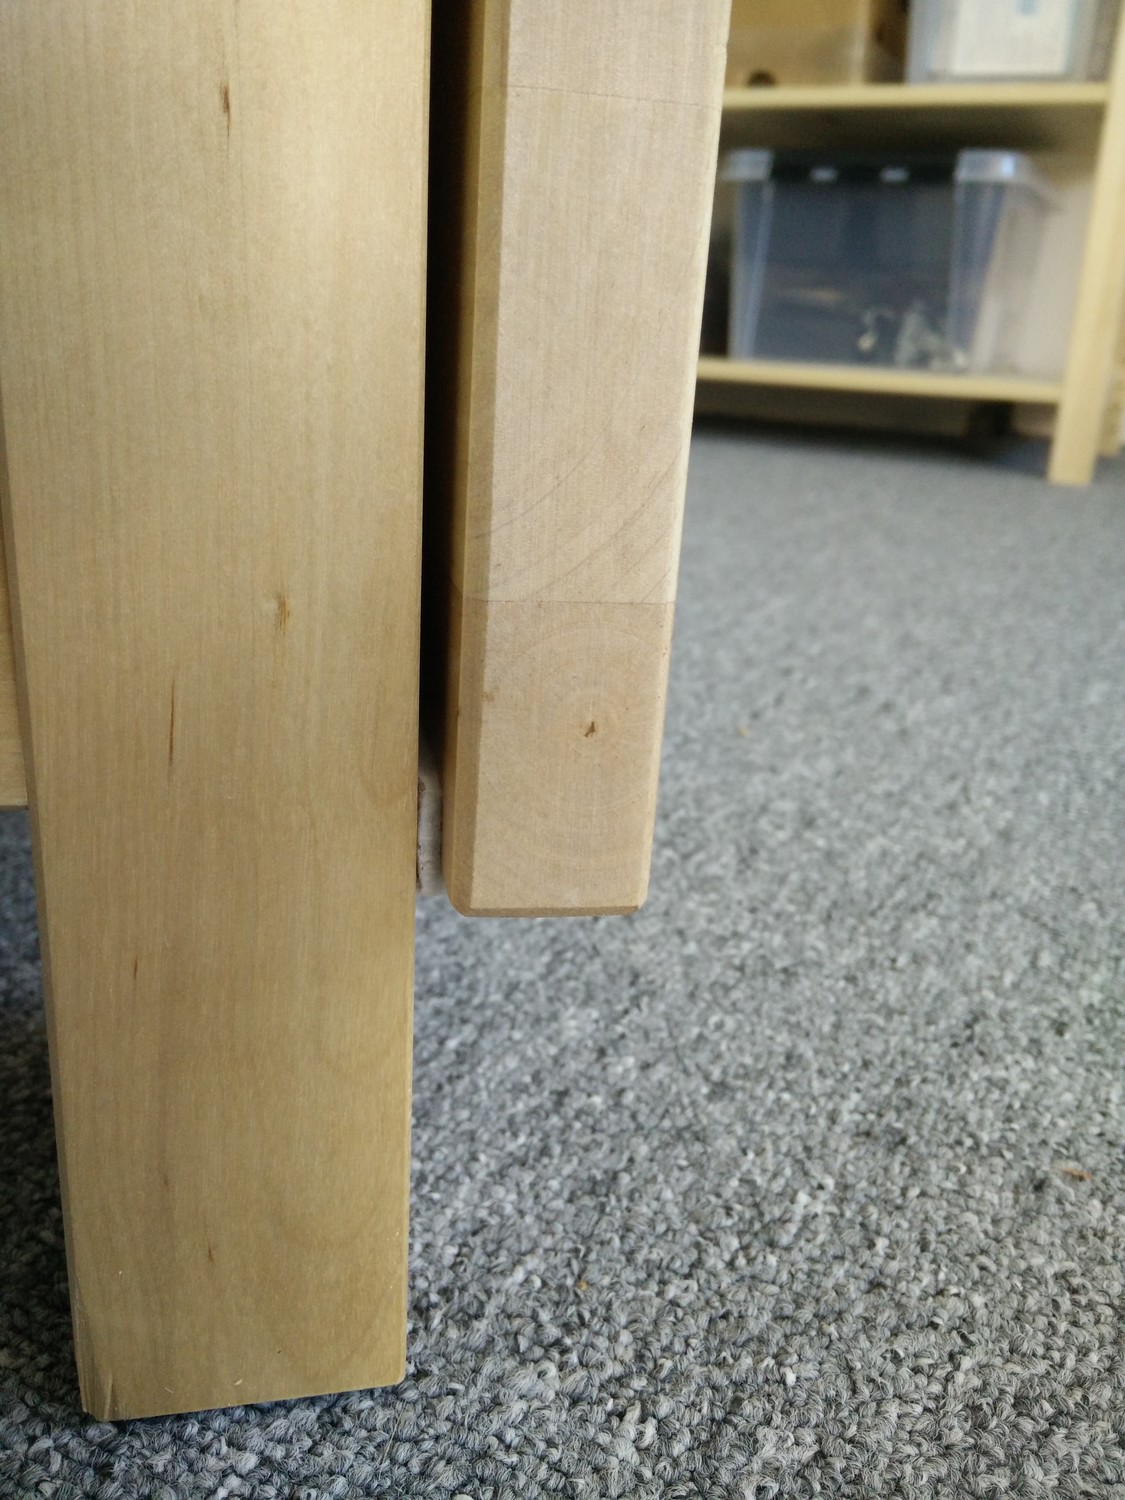
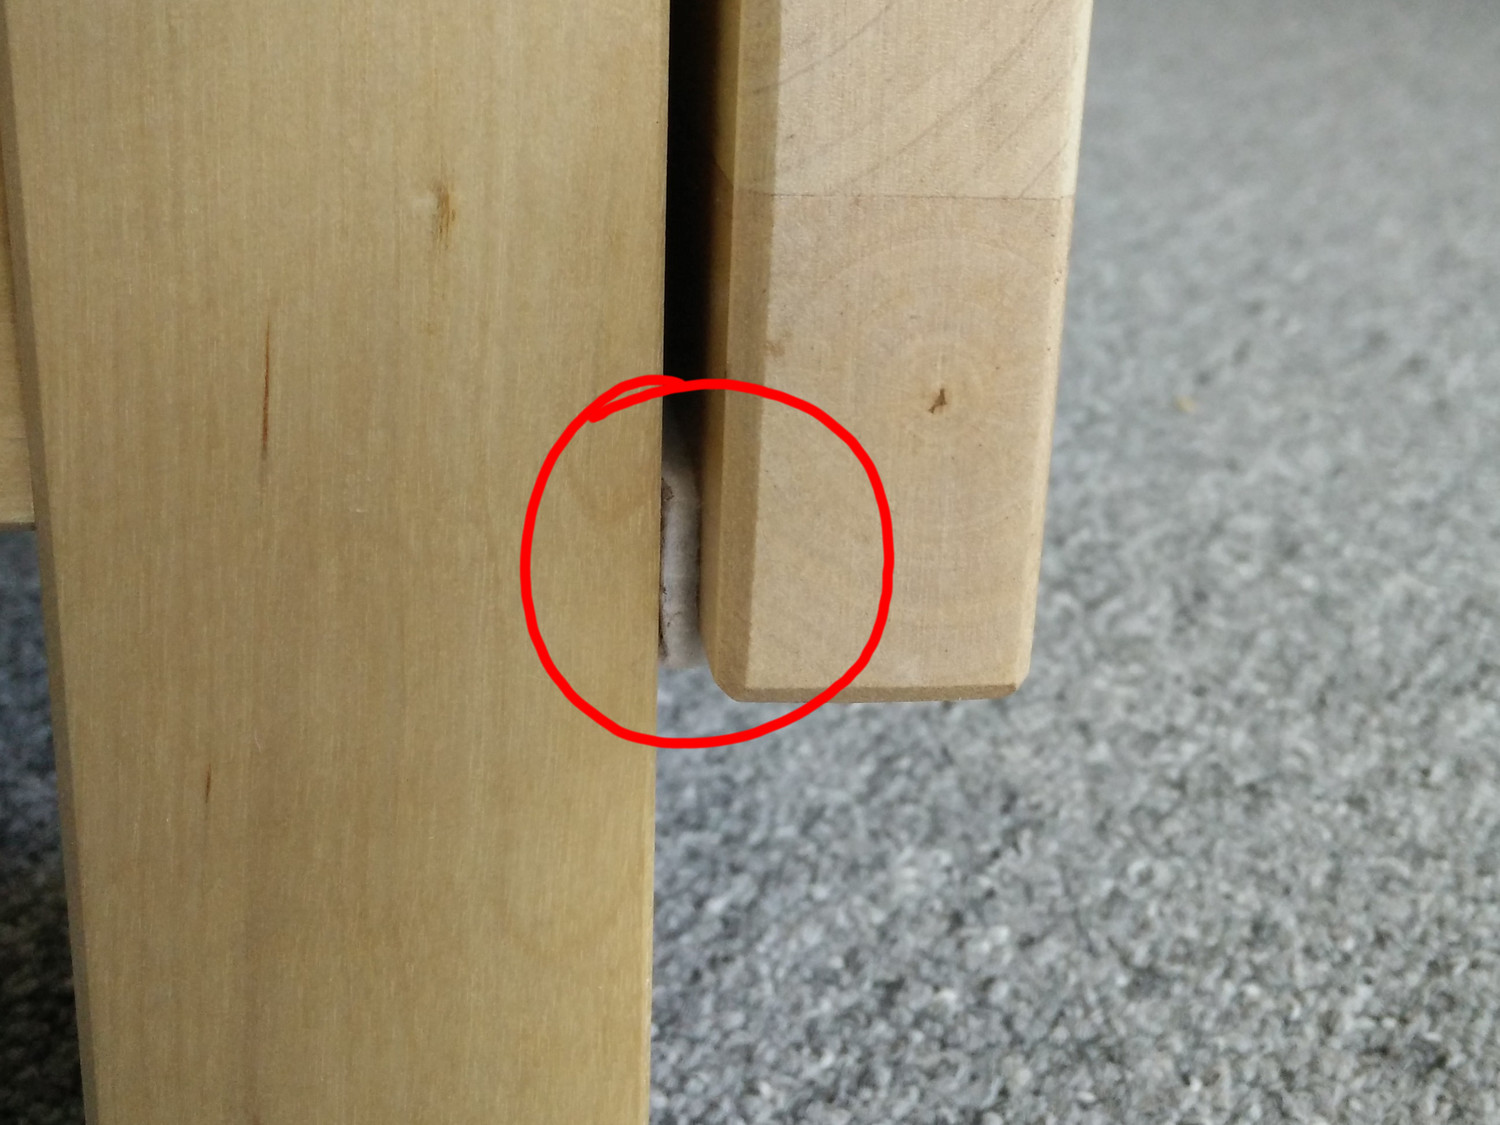
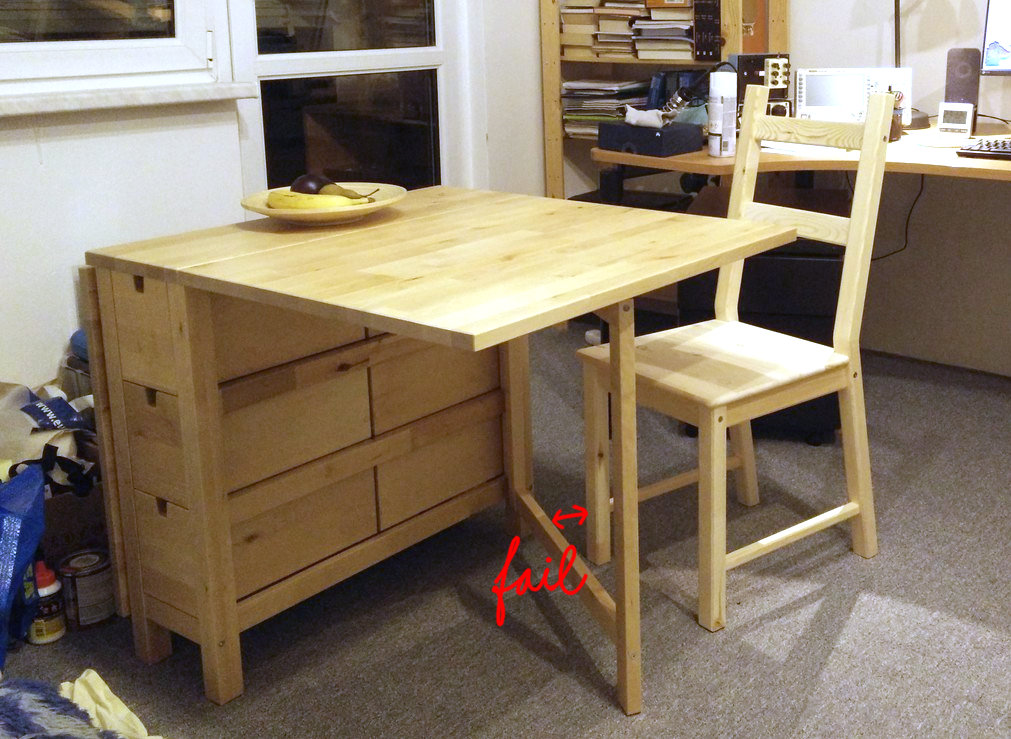
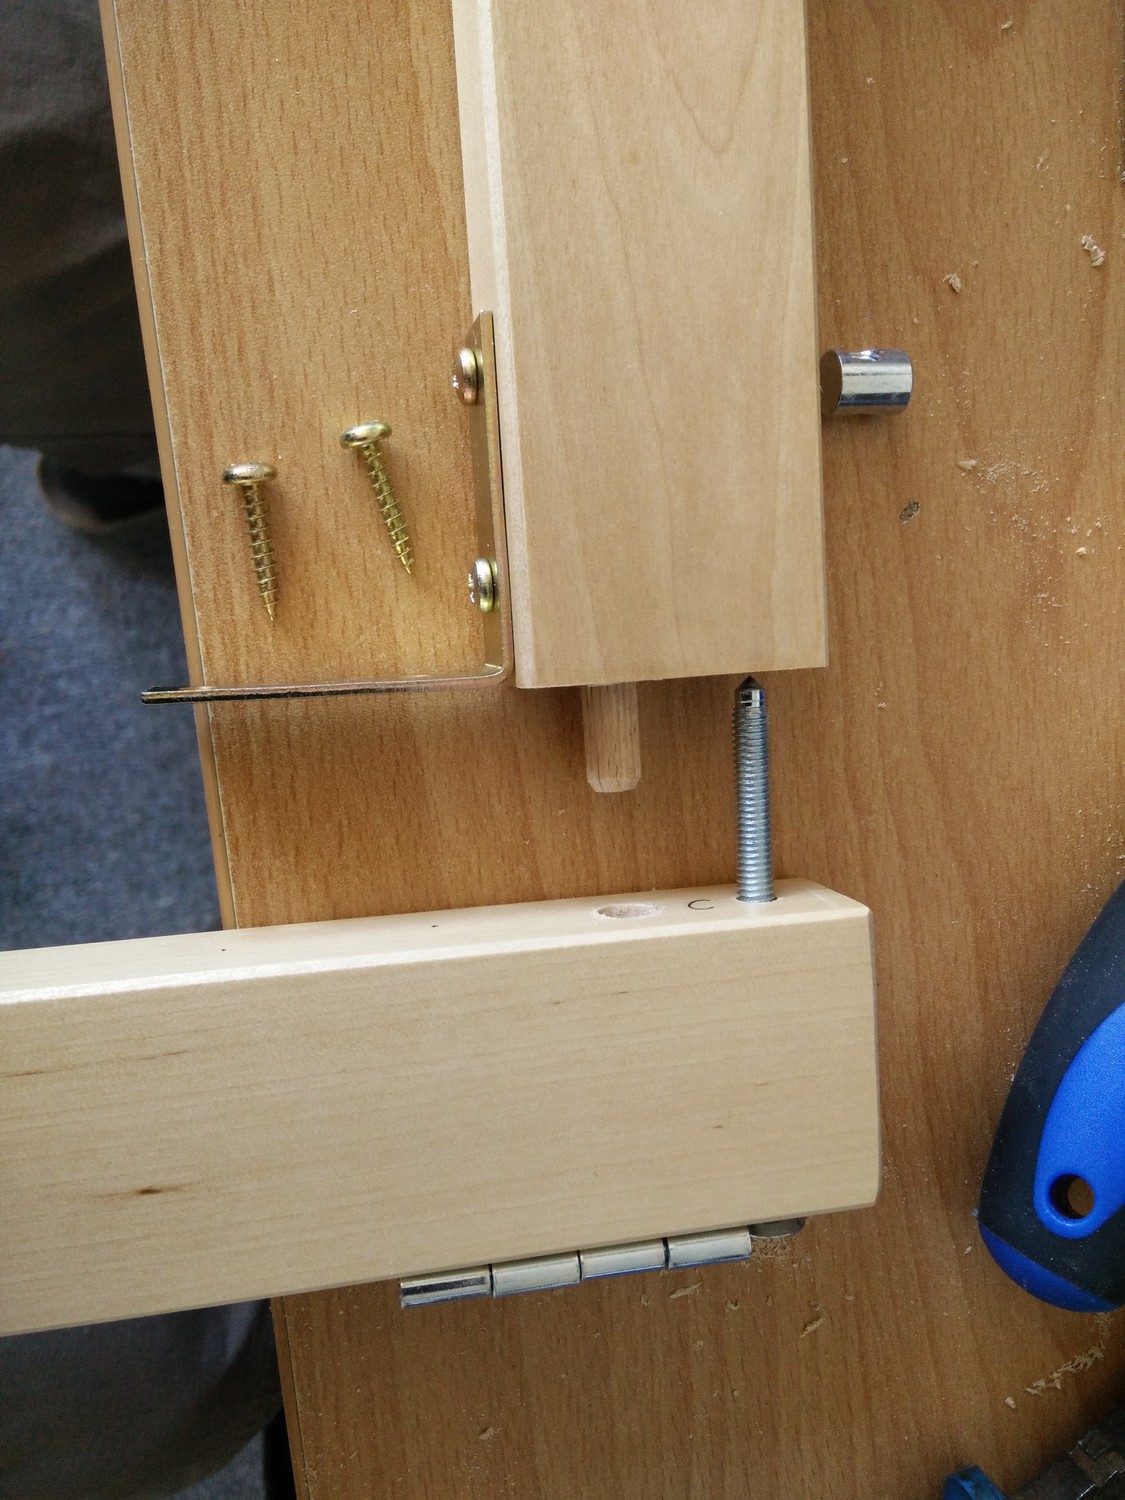
This is a major flaw of the table design, one that may deter people from buying it. It’s really quite obvious when you think about it–there is no legroom on one side of the table; it is apparent even from the official marketing photos. You can keep your feet under the chair, sure, but that’s hardly comfortable. You’ll also hit the bottom beam by accident when getting off the chair.
Could we remove the bottom beam? It’s a part of the pre-assembled piece, but it’s only screwed on, so taking it out is quite straightforward. What’s less straightforward is how to give the table its stability back after you removed this important part of the structure. Note how the leg now hangs on a single screw and a wooden pin that’s not even glued in place. Worse, the other end of the top beam is attached in exactly the same way, making the stability even worse. The leg keeps bending when you hit it by accidnet, when you open or fold it, etc. It’s just useless without the support of the bottom beam.
Gluing the Top
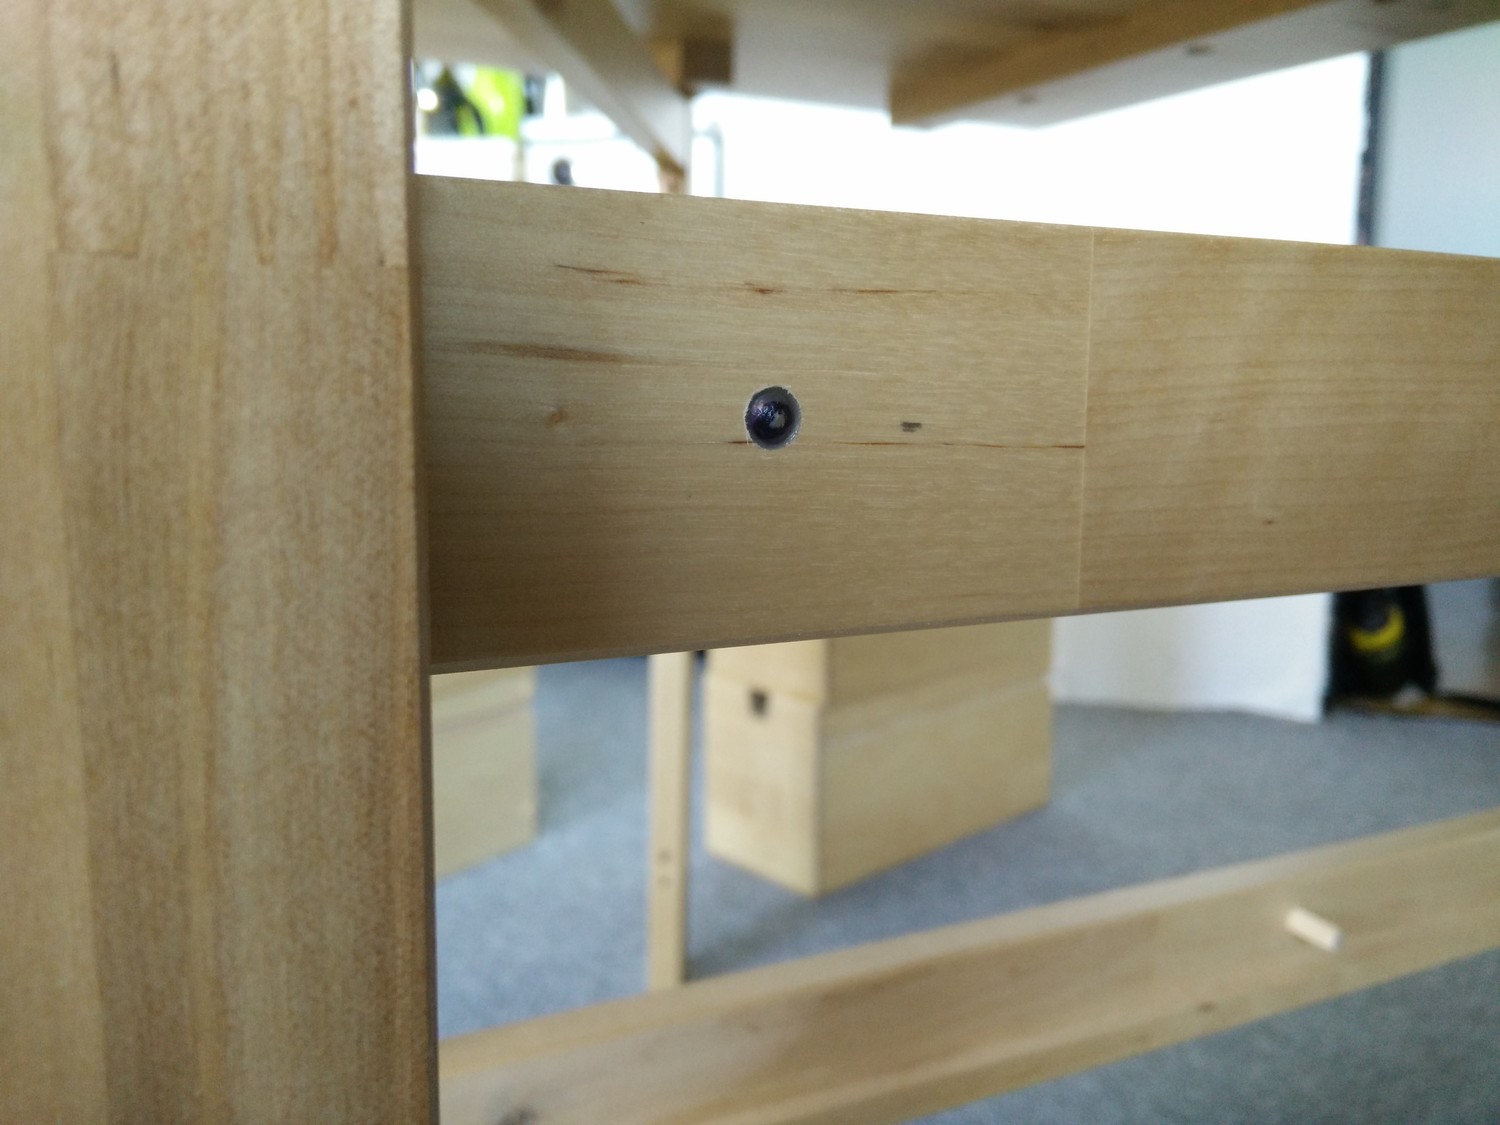
My first attempt at fixing the stability issue was by gluing the wooden pins that hold the leg structure together. That helped, but wasn’t quite satisfactory, because the wood of the pins still has a lot of flexibility–too much, as it turned out. The leg still kept bending and twisting, just less so. You can do this with a lot of strong glue, if you don’t feel up to the more complicated fix described below. Just keep in mind that removing a glued pin (and thus disassembling the leg structure, e.g. to apply the better fix) is impossible without breaking the pins and then drilling their remains away. It’s not that hard, but still sucks.
This works, was I got fed up with it after about two weeks.
Adding Metal Supports
Here comes my final modification of the table, one that actually worked and made it much better than the original.
You’ll need:
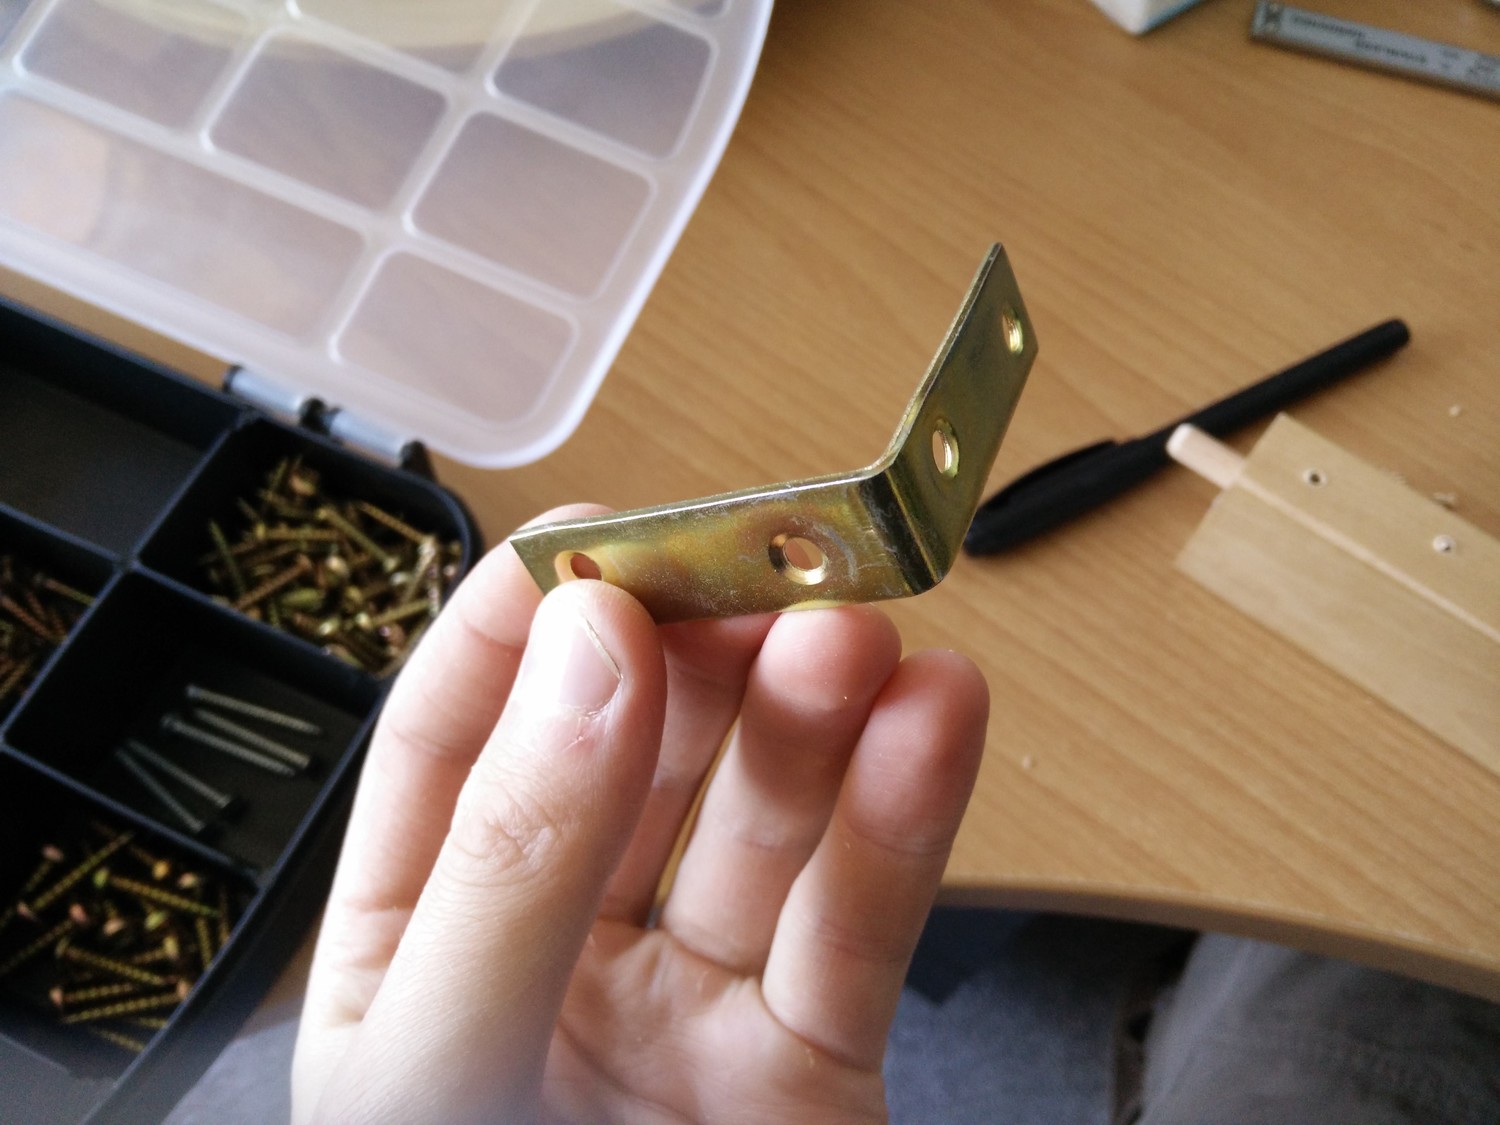
- 4 right angle steel connectors (get them in a hardware store)
- fitting screws (I used 2,cm ones, 2.5,cm is OK too)
- a screwdriver
- drill bit (to pre-drill the screw holes)
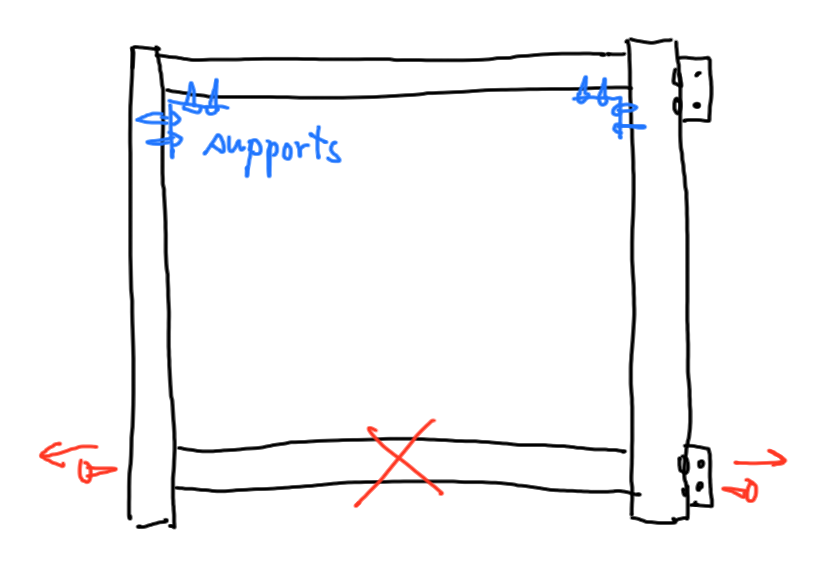
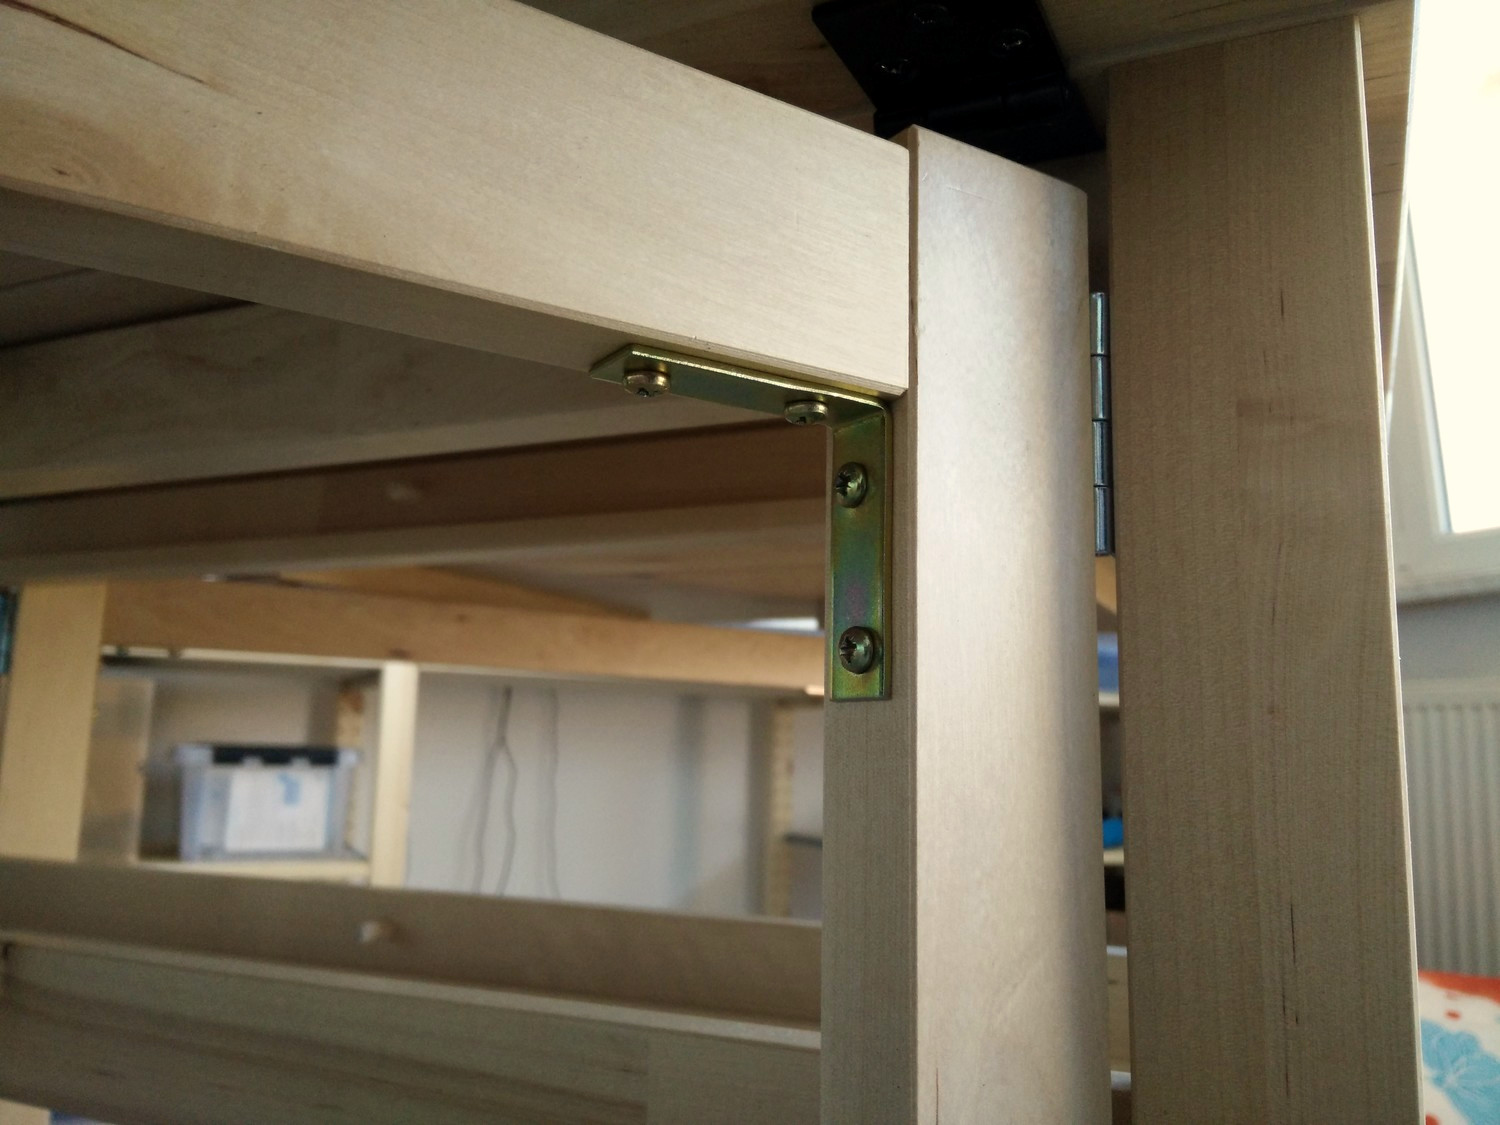
We’ll reinforce the leg structure by connecting the vertican and horizontal beams by steel connectors. Depending on the connector and screws you use, how well you drill the holes, and how you tighten it all, this should provide a similar strength to that of the removed bottom beam.
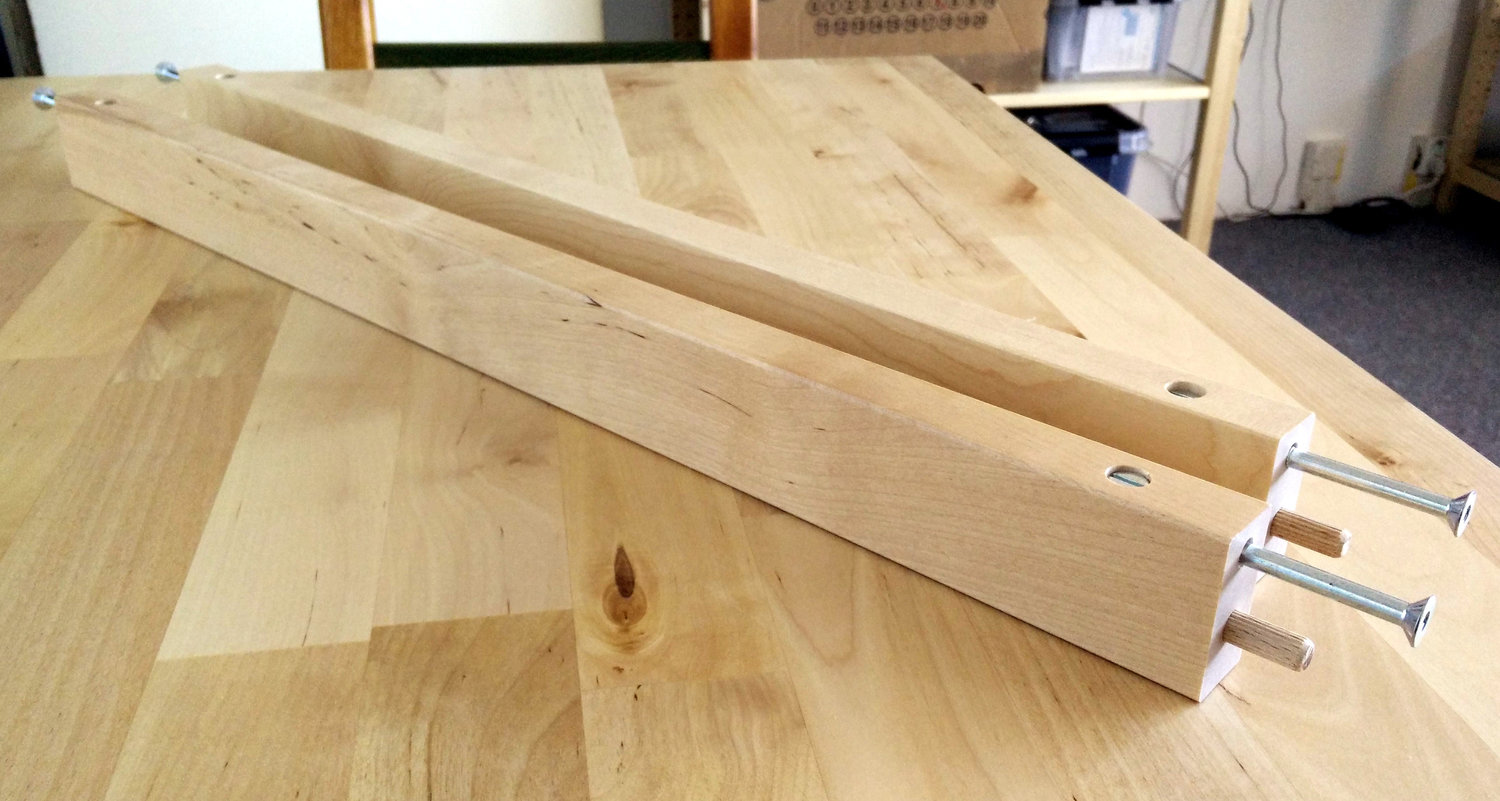
To do this, you first need to remove the leg piece from the rest of the table. It holds by 4 screws (the thick black ones). It’s kind of hard to reach, but they have a sharp slope so it’s just a few turns. Store the screws safely.
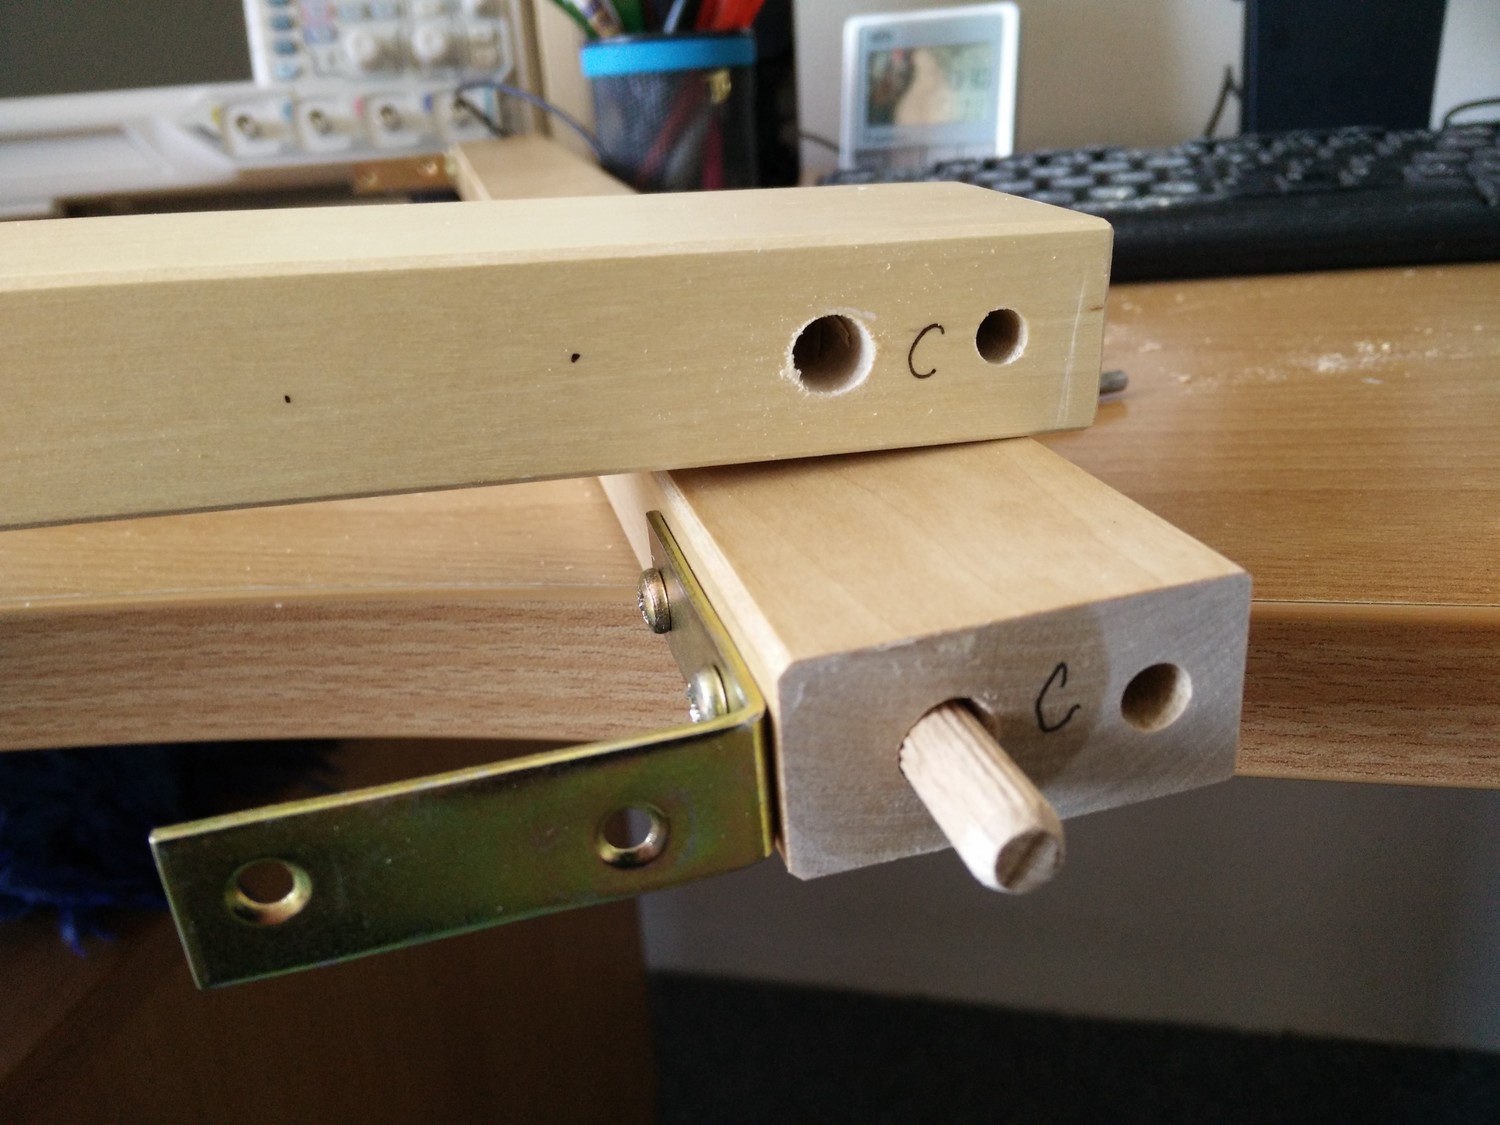
Unscrew the top and bottom beams of the leg part and take it apart; a rubber mallet can help here. Again, store the screws (and the nuts in this case) safely. Put the bottom beam away, you won’t need it anymore. It’s identical to the top beam in case you mess something up and need a backup.
I recommend that you mark which part connects where, e.g. with a pencil. You can use the hidden faces for this (that will be hidden when you put it back together).
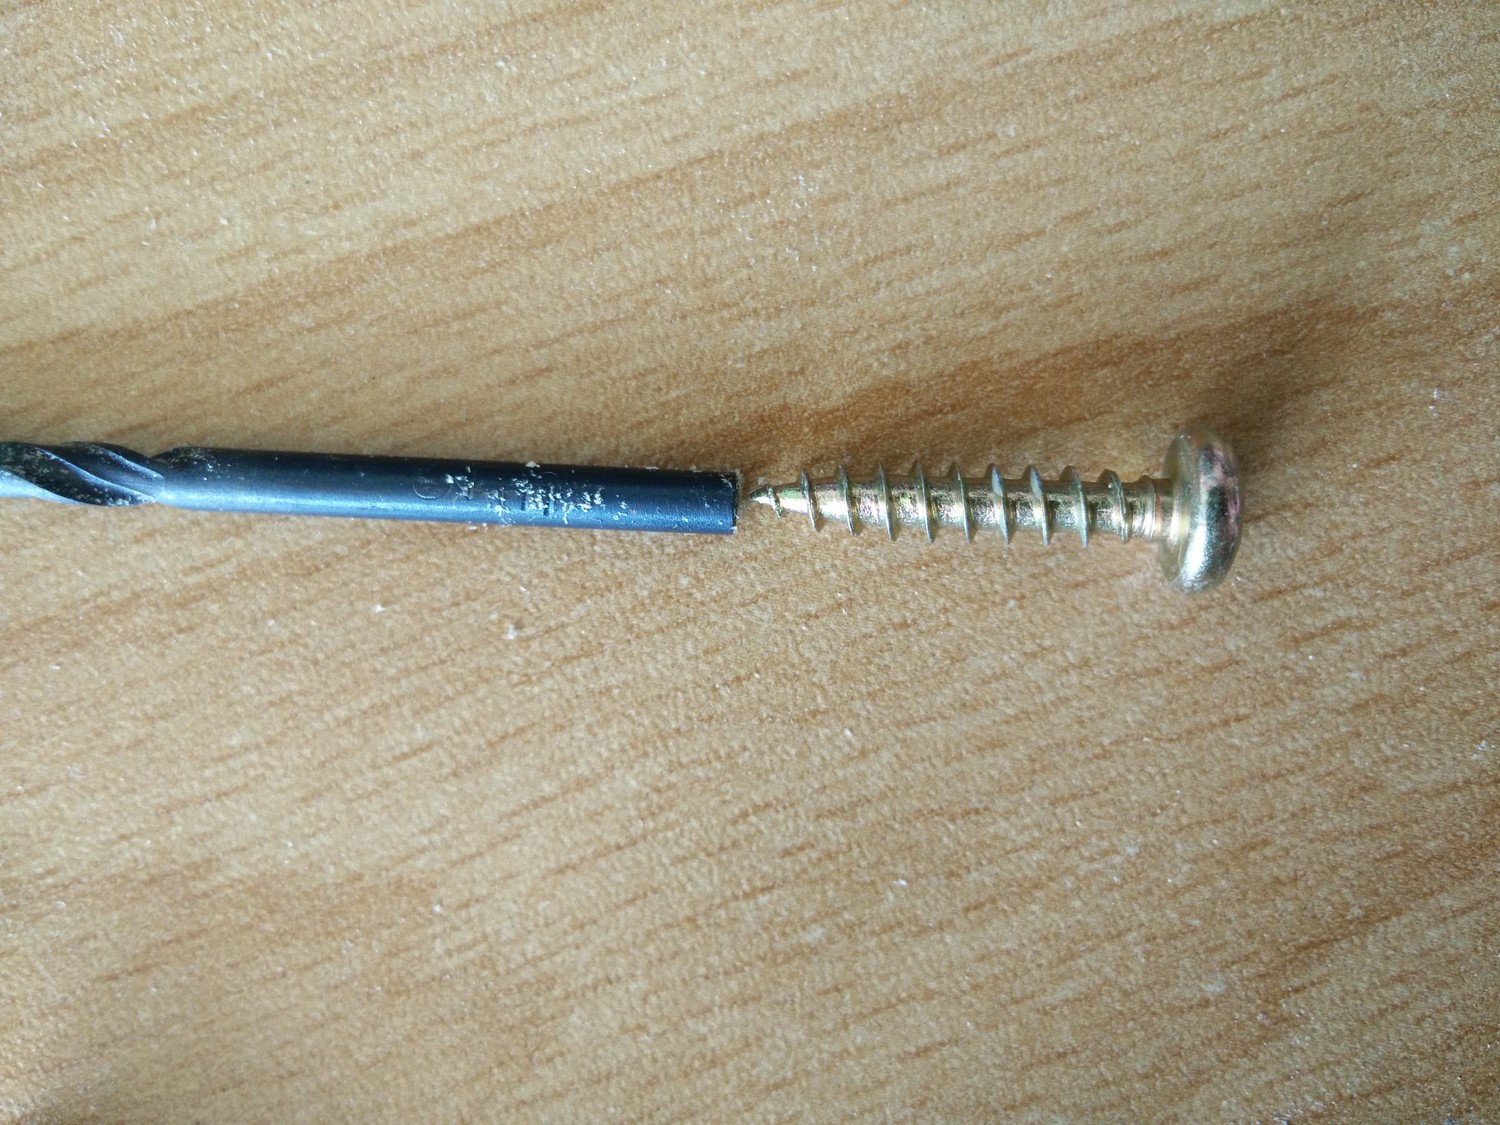
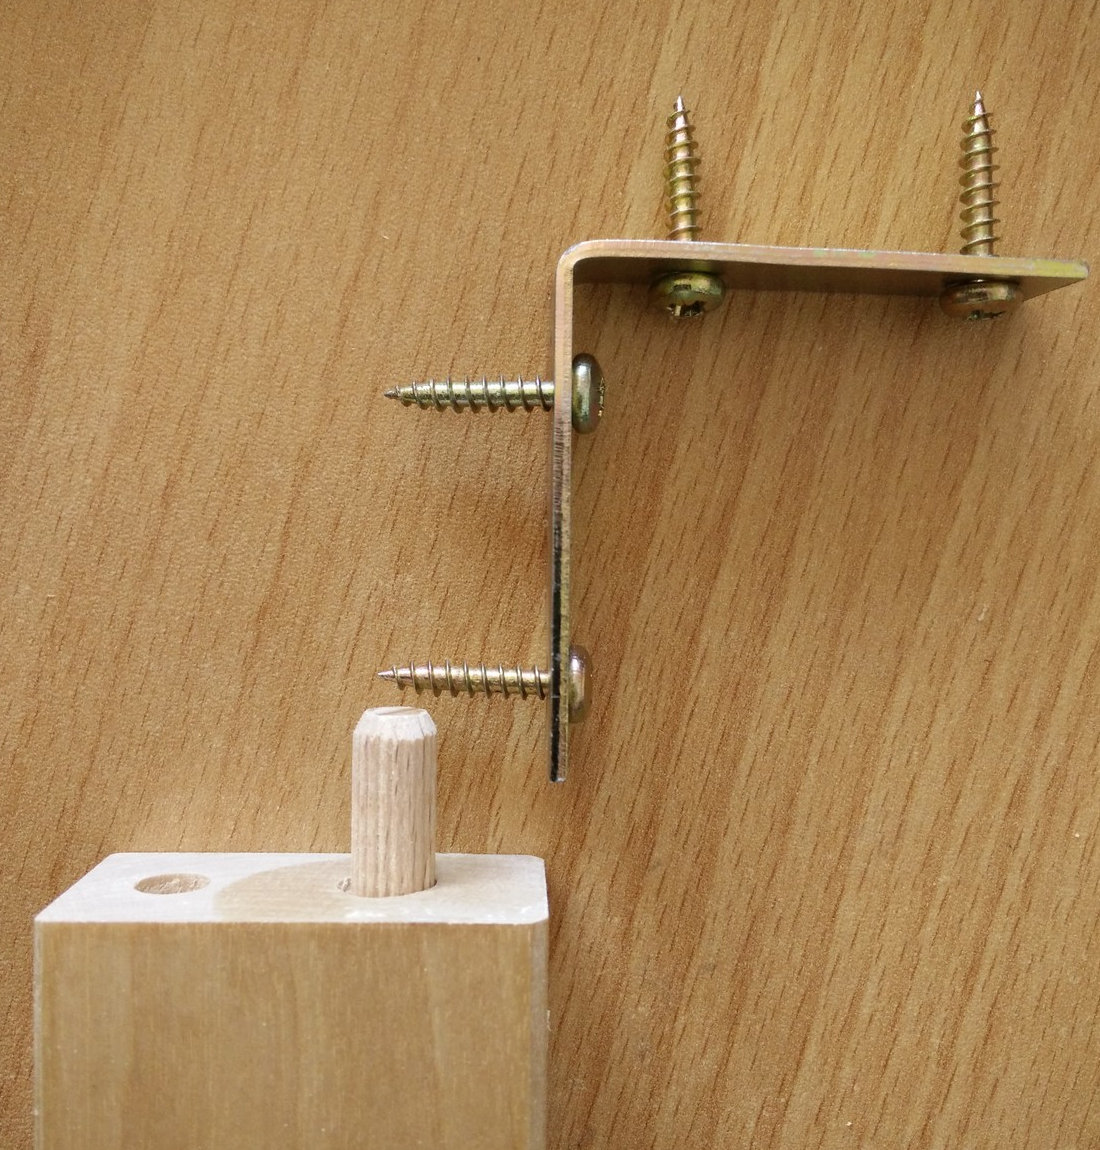
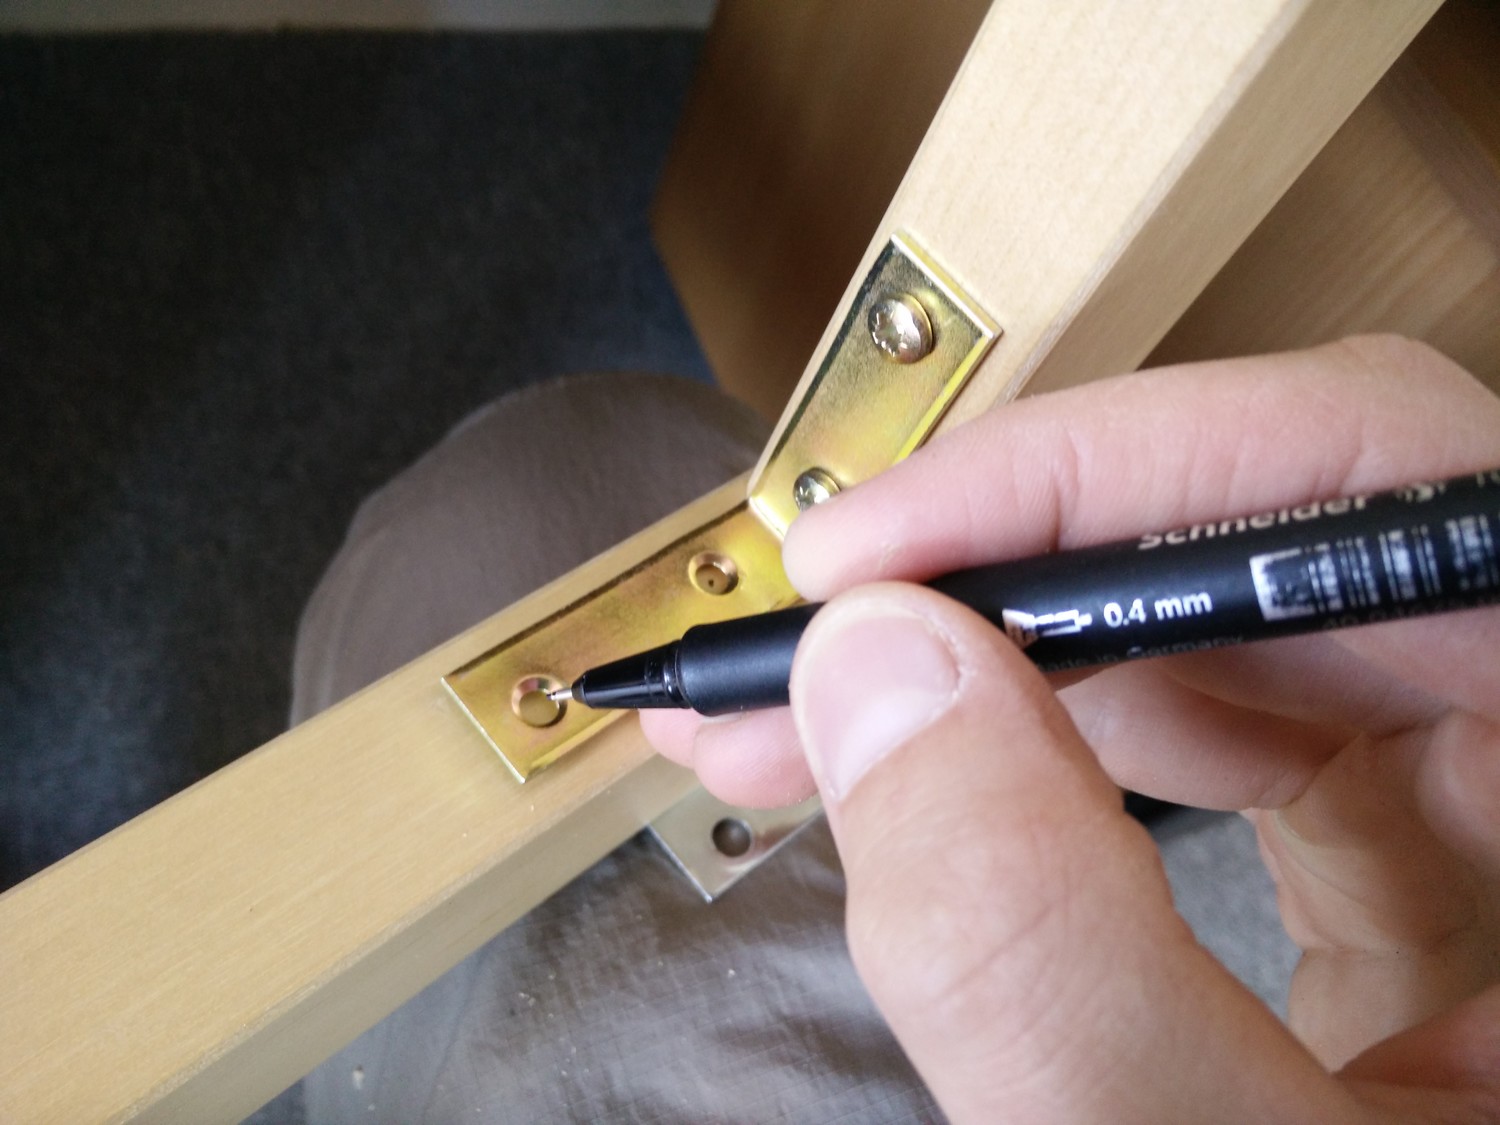
Place the angle connector on the top beam in the position where you want to screw it on. Make sure it’s well aligned and reaches just to the end of the beam. Mark the screw holes, remove the connector, and drill your guide holes. It is a hard wood, drilling will go slowly and the drill bit will get hot. Keep a right angle! Also don’t break your drill bit inside the wood, it’d be almost impossible to take out. This is why we’re pre-drilling the holes, too: breaking a screw in a wood like this is basically unfixable.
Note that the outer guide hole (and the screw) may cross the wooden pin. That’s okay, if anything it strenghtens the joint. Just make sure you put the pin in the hole before screwing the connector onto the beam.
After you’ve attached both connectors to the top beam, connect the side beams (the leg and the one with hinges) using the original long screws and nuts. Place the whole thing on sone good flat surface (the backside of the table desk works fine) and verify that everything is straight. You can lightly twist the leg up or down to fix any issues. Mark the drill hole positions on the side beams through holes in the connectors, then take it apart and pre-drill these holes as well.
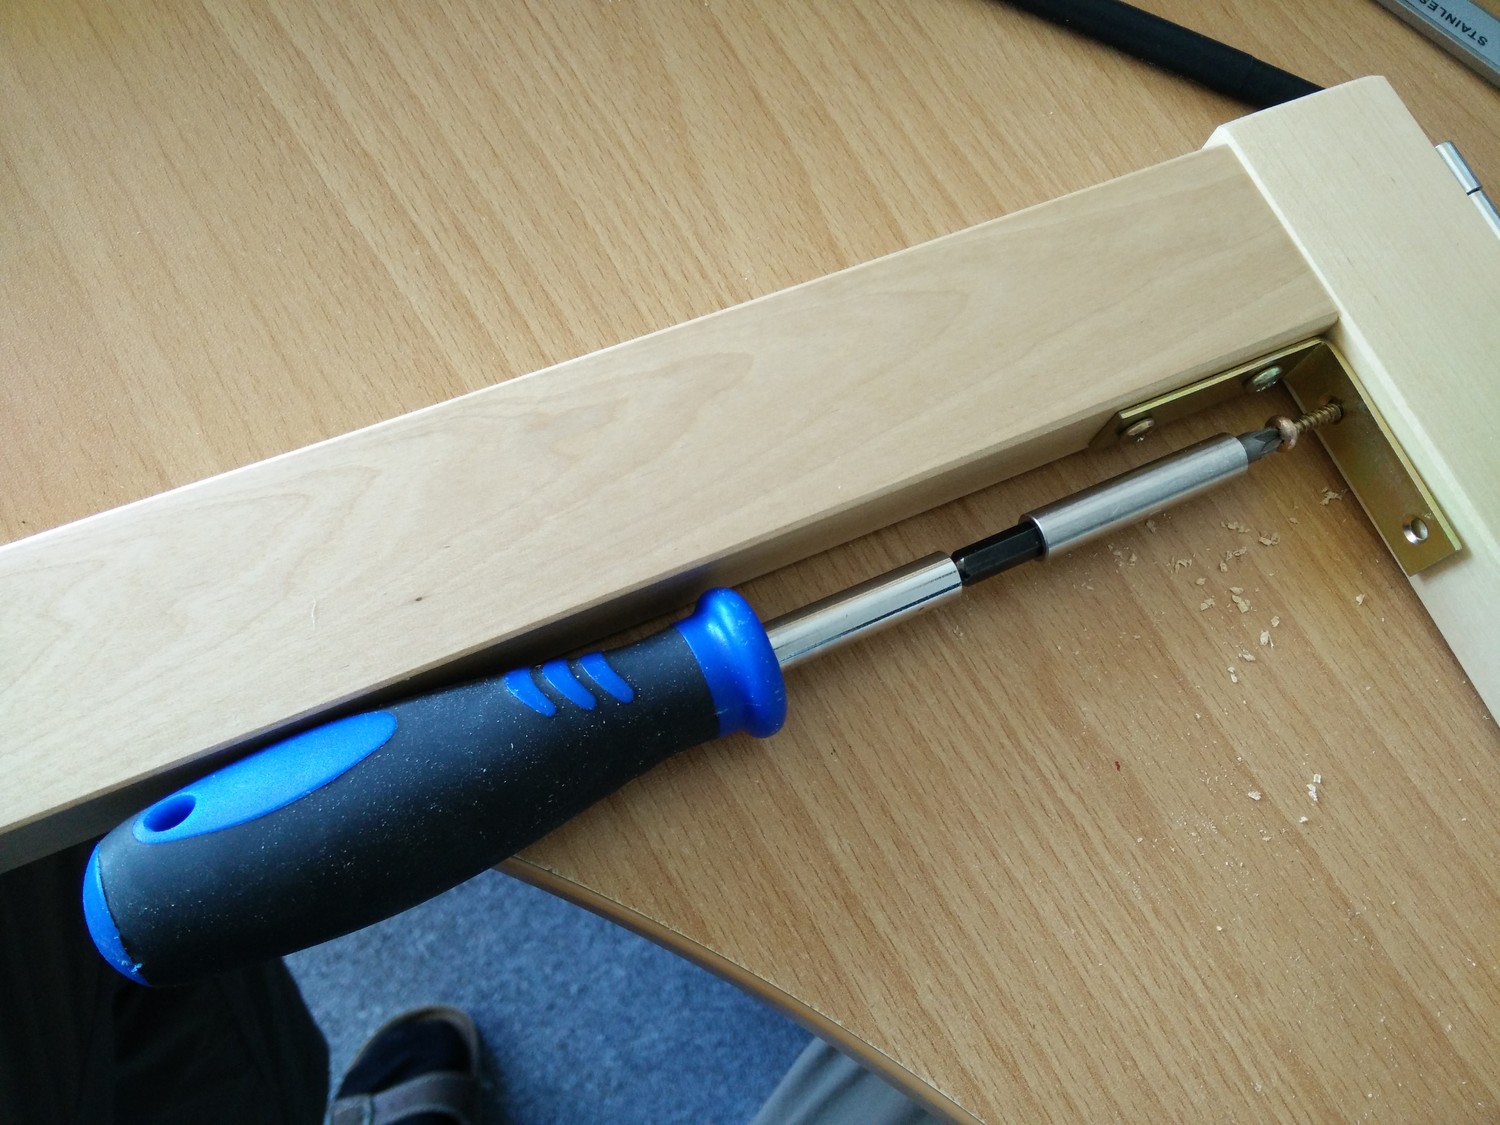
Putting the connector screws in may be a bit tricky, because there’sa not much space. I found that you can use a bit extension adapter for this and the screwdriver handle can then be a bit thicker and it still connects fine, with the adapter acting as a sort of hinge. YMMW. Just get the screws in and tighten them well. Again, verify that the leg piece is perfectly straight. Don’t forget to also tighten the big screws, they’re still very important. Since the connector screws usually have some leeway, you can loosen them and adjust the leg’s inclination if needed, then fix it by tightening them.
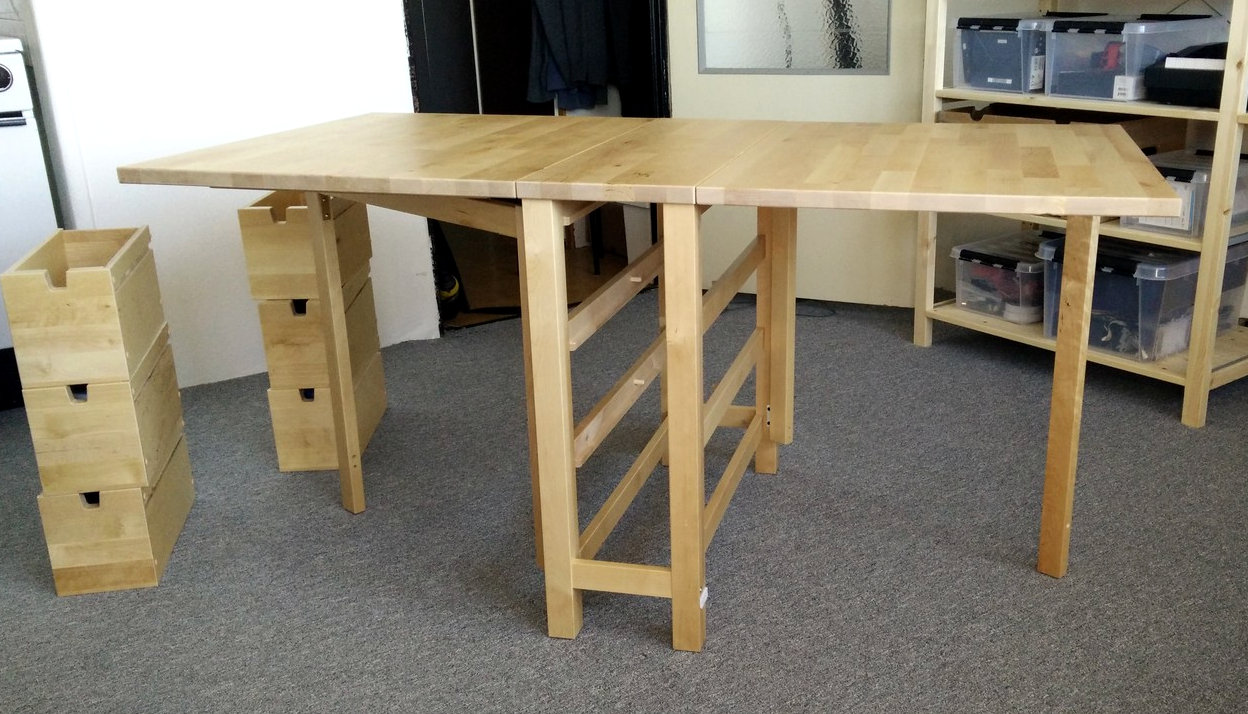
When done with the leg assembly, screw it back to the body. This is a bit tricky too; if it doesn’t seem to fit, lift the middle of the table a little (assuming you have the whole thing laying on its back). Finally flip the table over and check that everything works to your satisfaction.
Congratulations, you’re an IKEA Hacker! You can celebrate it with a barbecue on the leftover bottom beams, it’s a good, untreated hard wood ;o)
Update 2022: The table still works in this modified form, no problems at all!